
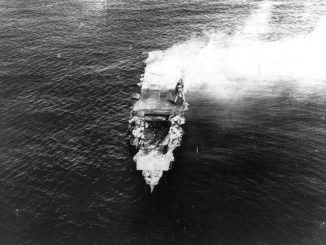
 in drydock at Pearl Harbor Naval Shipyard, 29 May 1942")
By March 1942 the Japanese had accomplished their pre-war goals of capturing the Netherlands East Indies and Malaya, together with the rich oil fields which they hoped would supply their economy. Burma was on the verge of falling, India was threatened, and British and American possessions across the Pacific had fallen into the hands of the Japanese. However the Allies were not defeated, showing no signs of coming to terms with the existence of the Greater East-Asia Co-Prosperity Sphere. Australia remained secure and American supplies were reaching the Allied forces there in increasing quantities.
The Royal Navy and the US Navy in particular were still a thorn in the side of the Japanese. The US Navy had been bloodied at Pearl Harbor and the combined ADBA naval forces had been destroyed or driven out of the East Indies, but the Pacific Fleet retained its powerful collection of aircraft carriers and was using these in a series of increasingly aggressive actions that threatened the newly enlarged perimeter of the Japanese Empire. This culminated in the attack on Lae in March 1942, and the Battle of the Coral Sea in May, which slowed and then stopped cold the naval advance towards the strategically important town of Port Moresby on New Guinea.
Even before Coral Sea the head of the Japanese Combined Fleet, Admiral Isoroku Yamamoto, wanted to bring the American carriers to heel and destroy them in a “decisive battle”, a concept which appeared prominently in Japanese naval strategy. The problem for Yamamoto was that the Americans were content to use their flattops to carry out hit-and-run raids such as those on Kwajalein and Makin in February and on Tokyo in April, withdrawing before the Kido Butai could hunt them down. Yamamoto needed a way to force a confrontation between his carriers and their American counterparts.
Operation MI
The plan Yamamoto put together called for an attack on a target that the Americans would be forced to defend. Ideally this would have been Hawaii itself, particularly Pearl Harbor, but since the attack there in December 1941 the Americans had greatly reinforced the base and it was highly unlikely that any repeat operation would succeed. Therefore Yamamoto selected Midway, at the extreme western end of the Hawaiian island chain, as the target for his plan. He hoped that its capture would force Admiral Chester Nimitz to send his carriers to relieve the defenders, or else risk having Hawaii fall within range of Japanese submarines and bombers operating from Midway.
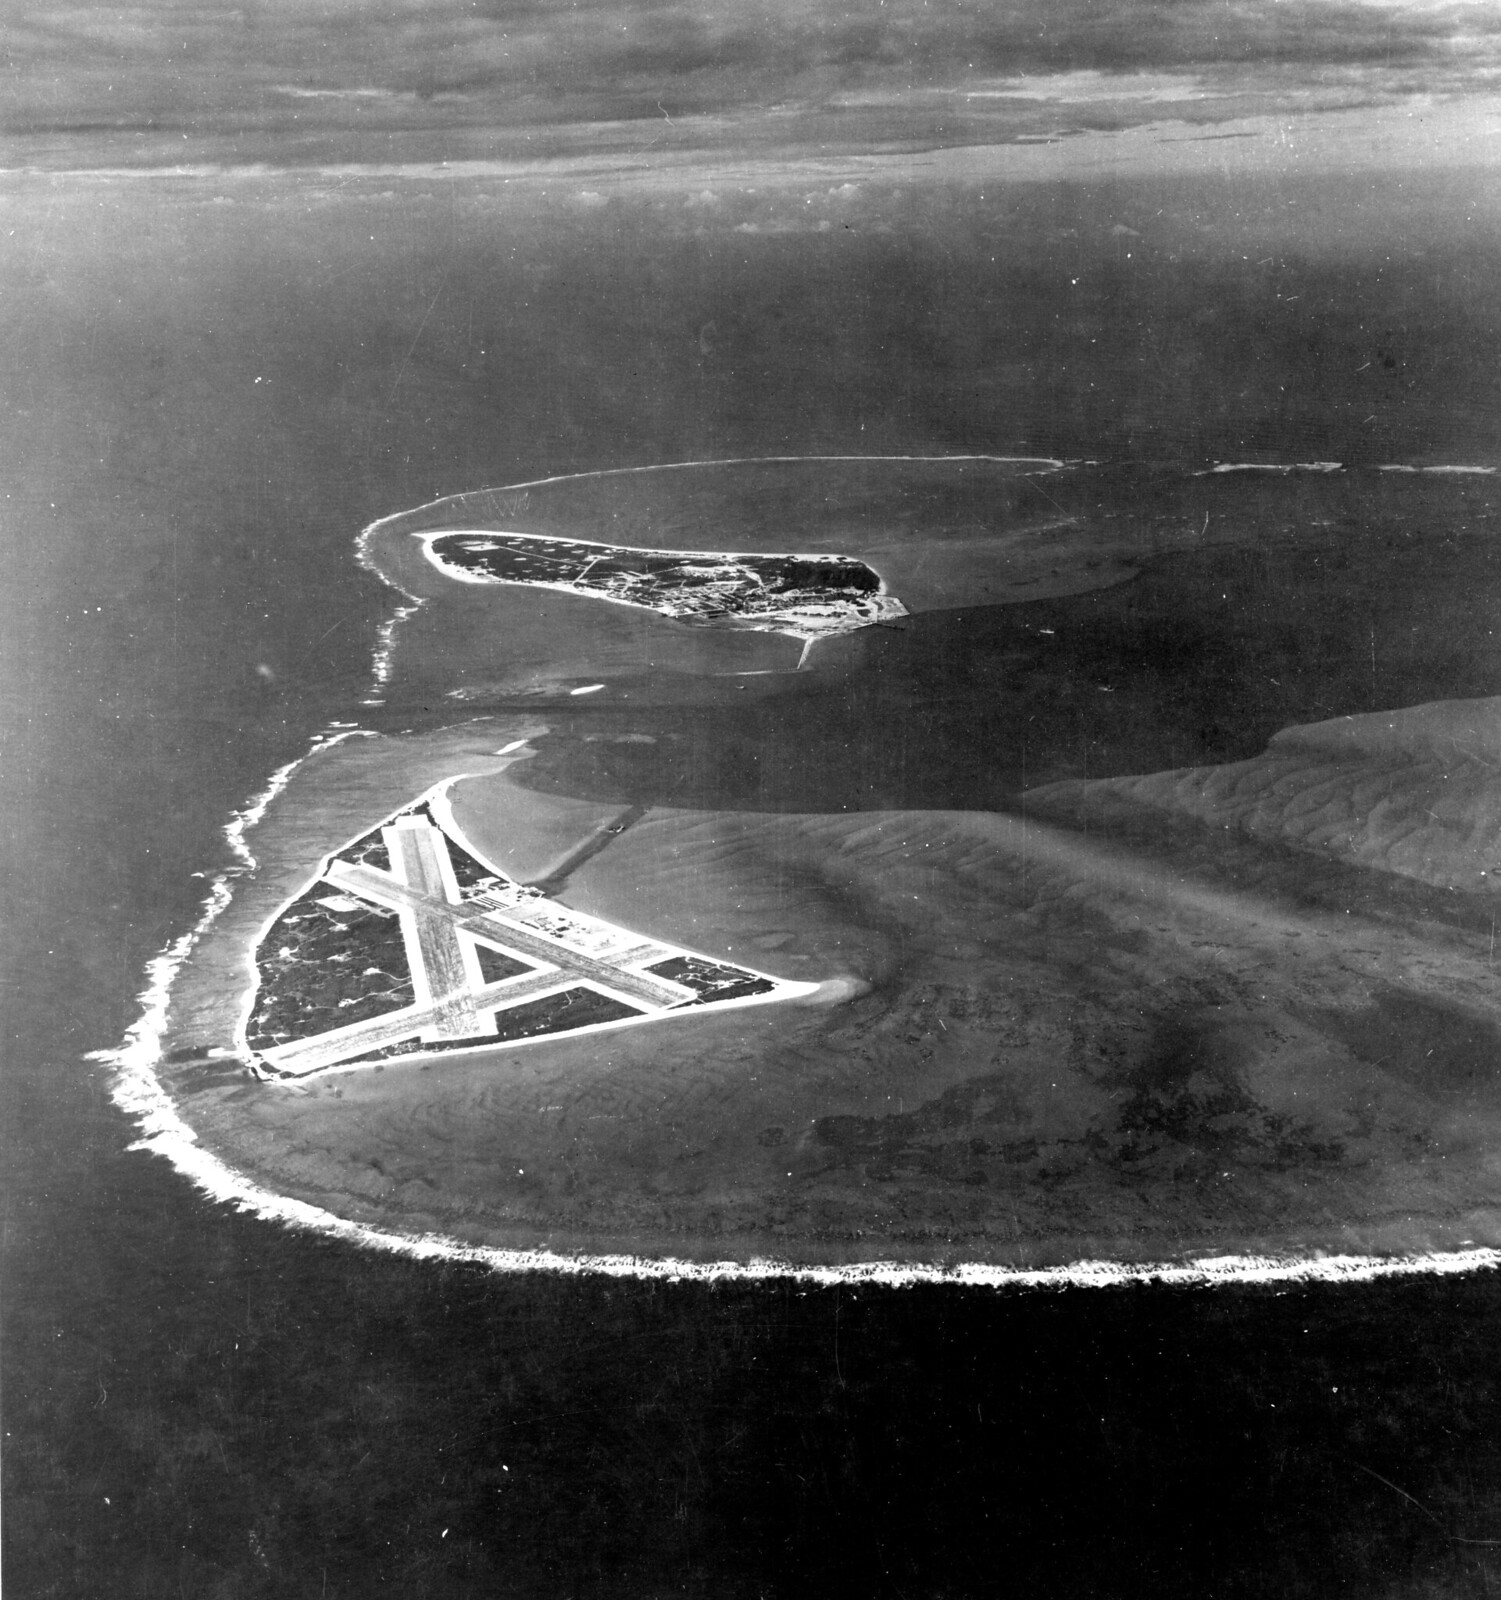
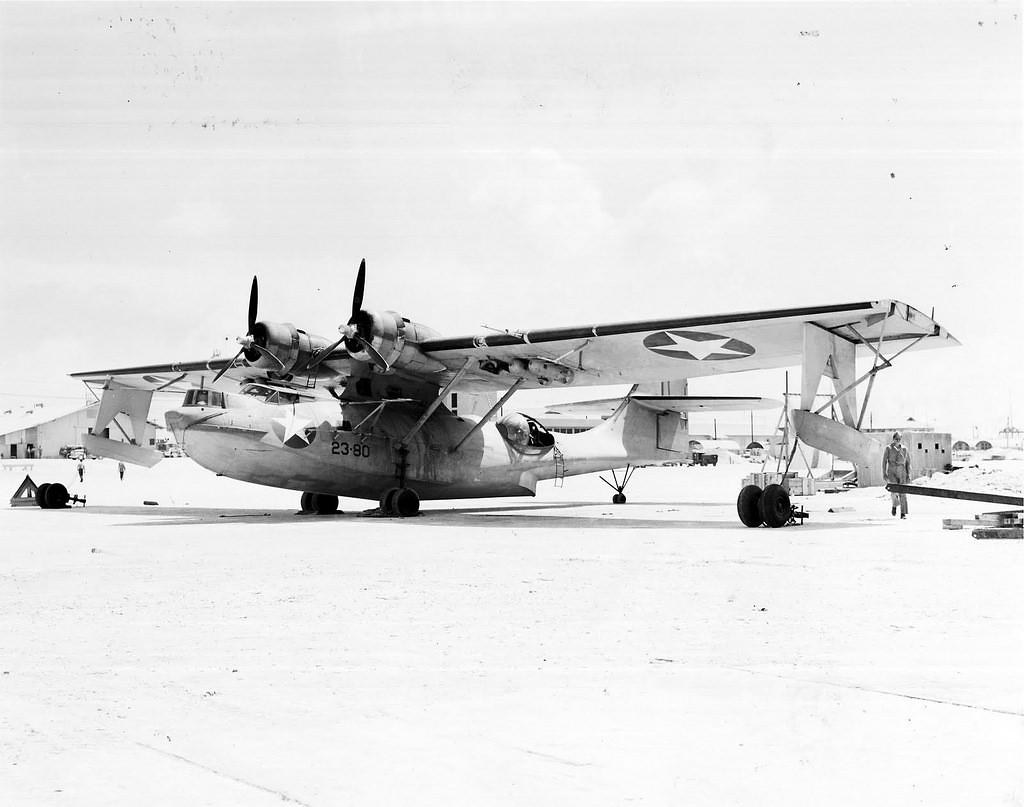
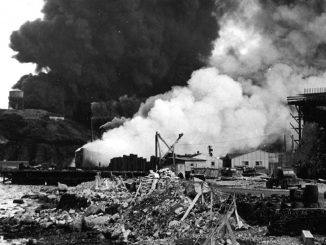
Midway was a circular coral atoll 1,300 miles from Pearl Harbor. It consisted of two small islands, Sand and Eastern, at the southern end of the atoll. Eastern Island housed a small naval air station with three runways which covered most of the land area. This airfield had been used as part of the South Pacific Air Ferry Route, with B-17s staging through on their way to the Philippines. Marine Air Group 22 with a fighter and scout bomber squadron now occupied the field. Sand Island, the larger of the two, hosted most of the 6th Marine Defense Battalion as well as a seaplane base which had previously been used by Pan Am’s clippers. A squadron of Navy Catalina flying boats, VP-23, operated from the lagoon, patrolling the seas to the west of Midway. Occasionally Army aircraft staged through Midway on their way to reconnoitre Wake Island. Aside from a brief shelling by Japanese destroyers on December 7th and the shooting down of an Operation K flying boat in March, Midway had been a backwater to this point in the war.
There were major differences between the Navy plan and the Army’s preferred approach of an offensive in the southwest Pacific. The Army favoured a move from Rabaul south through the Solomon Islands chain towards New Caledonia, a major Allied base, and then on to Samoa. This would cut the Allied lines of communication between the United States and Australia, stopping the flow of supplies to MacArthur’s forces and potentially allowing for an offensive to seize northern Australia as a follow-on operation. A subsidiary Army plan also called for the seizure of the Aleutian Islands in the Northern Pacific which would protect the Empire’s northern flank from potential American incursions from that direction.
Yamamoto overcame the Army’s objections by agreeing to support the occupation of the Aleutians simultaneously with the start of the Midway operation. Midway itself would be occupied by troops from the Navy’s Special Naval Landing Force, absolving the Army of involvement in that operation. Further operations in the south seas with the aim of capturing New Caledonia and Samoa would follow the successful occupation of Midway. There remained objections within the Navy itself, but Yamamoto’s forceful arguments backed by his threats to resign seemed to be swaying the Naval General Staff. The Doolittle Raid of April 18th proved an enormous embarrassment to the Japanese, particularly to the Navy which had responsibility for securing the waters around the Empire, and Yamamoto used this to overcome the remaining objections. D-Day for the MI Operation was set for the 3rd of June, 1942.
Tactically, the plan called for the Kido Butai to sail within striking range of Midway, destroy the air base and its defending aircraft, then support the landing force as it occupied the atoll. It was expected that the American carriers would then sally forth from Pearl Harbor to come to the rescue of Midway, at which point Kido Butai would intercept and sink them. In support of Kido Butai would sail the rest of the Combined Fleet, commanded in person by Yamamoto. His main body would join the fight and destroy any remaining American ships that survived Kido Butai’s attentions. The plan was simple in concept but when combined with the Aleutians campaign required the employment of virtually every warship that Japan possessed.
To keep tabs on the American carriers, a plan was made track them from Pearl Harbor to the Midway area. Operation K was to be resurrected, and a H8K Type 2 flying boat was to fly from the Marshall Islands via a submarine refuelling stop in the French Frigate Shoals to reconnoitre Oahu, to verify that the Pacific Fleet was still in port. Then, two cordons of submarines would be positioned between Oahu and Midway, to report the passage of the Americans and to carry out the traditional role of attrition. However, both of these measures would prove to be lacking when the operation began, and the Japanese would have no inkling of the location of the carriers until it was too late.
American Response
Yamamoto’s plan began to come unravelled even before the first ship had left Japan. First, he lost the services of a third of his carrier force when the Shokaku and Zuikaku were committed to the Port Moresby operation. In the ensuing Battle of the Coral Sea, Shokaku was badly damaged by bombs and required several weeks of repairs. Her sister Zuikaku escaped undamaged, but lost so many planes and pilots that her air group was considered unfit for service. Both ships were removed from the operation, leaving Kido Butai commander VAdm Chuichi Nagumo with just four carriers – Akagi, Kaga, Hiryu and Soryu. The Japanese believed that they had sunk both American carriers at Coral Sea, but in fact only Lexington was lost. Yorktown suffered damage but returned to Pearl Harbor in late May.
Unbeknownst to the Japanese, American intelligence had already caught wind of the Midway Operation. Naval intelligence codebreakers had made great strides in breaking the Japanese naval cipher, JN-25, and had begun to read portions of the messages. In March there were hints in the intercepts of an impending attack on Pearl Harbor, but the intelligence was not accurate enough to give concrete warning of what eventuated as the Operation K raid of the 4th of March. Working hard to break more of the Japanese ciphers, naval intelligence station ‘Hypo’ at Pearl Harbor began to pick up messages regarding the capture of a location known by the codename ‘AF’ in early June. Further intelligence breaks gradually led Hypo to believe that the target was in fact Midway, but Admiral Ernest J. King in Washington was not convinced. A ruse was conducted, whereby Midway was ordered to transmit a message in the clear that its water purifying plant had broken down. The Japanese took the bait and transmitted a coded message declaring that AF was short of fresh water, confirming Midway as the target.
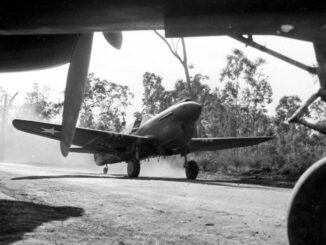
With this information in hand, Nimitz took steps to fortify Midway against the attack. The air garrison was substantially reinforced: three additional Catalina flying boat squadrons were moved to the island, as were new F4F Wildcat fighters and SBD Dauntless bombers for the two Marine squadrons. The Army Air Force contributed 17 B-17 Flying Fortress bombers and four new B-26 Marauders that were fitted with racks for Navy Mark 13 torpedoes. Last to arrive were a detachment of brand-new TBF Avenger torpedo bombers. These were assigned to VT-8 from the Hornet to replace her ageing TBD Devastators, but had not arrived in time to join the ship. Instead, the Avenger would make its combat debut flying from Midway rather than the deck of a carrier.
The most important addition to the American forces that would attempt to turn back the Japanese fleet was the carrier Yorktown. Damaged from a pair of bomb hits during the Battle of the Coral Sea, she limped into Pearl Harbor on the 27th of May. Shipwrights estimated that 90 days of repairs were required to bring her back to full fighting trim, but a program of temporary repairs by men working non-stop could get her back to sea on just three days. Yorktown entered drydock on the 28th and was ready to sail on the 30th, just in time to join her sisters Enterprise and Hornet.
Departure
The Kido Butai departed from its anchorage at Hashirajima on 27th of May 1942, a day later than originally planned. The four carriers were escorted by two fast battleships, the heavy cruisers Chikuma and Tone (carrying five seaplanes each), another light cruiser, and the usual gaggle of destroyers. The Landing Force and Occupation Force departed from Saipan two days later, taking a more southerly route to Midway which allowed the ships to partially benefit from air cover from Wake Island. The Midway invasion force also had a single light carrier, Zuiho, for local air cover. Providing distant support was the First Fleet, led by Yamamoto himself riding in the enormous battleship Yamato. First Fleet was to stand by around 600 miles from Kido Butai, prepared to sail into battle if the American fleet unexpectedly appeared. This enormous force sailed east, seeking decisive battle with its American counterpart. Little were the Japanese to know that the battle would be decisive for all the wrong reasons.
Leave a Reply