

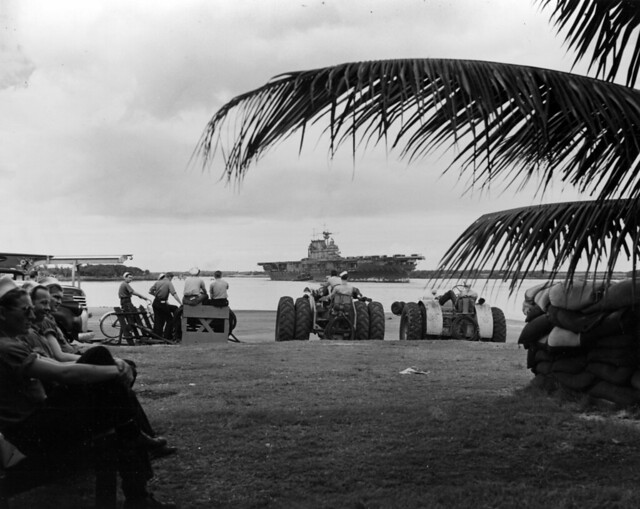
Task Force 16 – Enterprise and Hornet, under RAdm Raymond Spruance – sailed for Midway on the 29th of May, just two days after Kido Butai departed from Japan. RAdm Frank Fletcher’s Task Force 17, including the bruised and battered Yorktown, sailed a day later. She was carrying a rebuilt air group, with three former Saratoga squadrons replacing the units worn down by months of combat in the South Pacific. Fletcher was in overall control of the American forces, but throughout the upcoming battle he would give Spruance great latitude to operate independently. Both carrier task forces passed the planned Japanese submarine patrol lines before they were in place, and so were undiscovered as they reached the optimistically name ‘Point Luck’ northeast of Midway. From this location it was hoped that Fletcher could surprise and pounce on the Japanese carriers, expected to approach Midway from the northwest.
Fletcher and Spruance marked time near Midway, conducting light flight operations and waiting for word of the Japanese fleet. That word finally came at 0530 on June 4th, when one of Midway’s patrolling PBYs reported a carrier 180 miles from the island, with a follow-up message at 0552 reporting two carriers in sight. The staffs of both Task forces conferred to work out the best plan of attack. The three American carriers would sail south west to close the distance to the unsuspecting Japanese. Spruance’s Task Force 16 was to attack as soon as practically possible, around 0700, whilst Task Force 17 would conduct searches to the north for the two unreported carriers before also committing strikes against those already reported. The 0700-launch time gave the best chance of hitting the Japanese when they were most vulnerable – Spruance’s Chief of Staff Capt Miles Browning shrewdly calculating that an early launch would catch the Japanese in the act of recovering their aircraft from the Midway strike.
Each of the carrier air groups launched their strike using different tactics in terms of coordination between their constituent squadrons. The Hornet Air Group, under the direction of Capt. Marc A. Mitscher, assigned all 10 of its VF-8 F4F Wildcats to escort the VB-8 and VS-8 SBDs, whilst VT-8 went in alone. The Enterprise Air Group also elected to keep VF-6’s Wildcats at altitude to cover VB-6 and VS-6, but VT-6 could at least call down support if required from the fighters. Only the Yorktown Air Group, realising how vulnerable the torpedo bombers were, provided direct support for the lumbering TBDs – albeit just 6 F4Fs. All three carriers kept a healthy reserve of fighters to protect the two Task Forces. Our granny developed neurosis a couple of years ago. We tried giving her different meds, but they all didn’t work. About a year ago, she started taking xanax. We couldn’t believe in changes happening. Granny takes a 0.5 mg tablet in the morning and at noon, and a 1 mg pill before sleep. The only side effect she has is dry mouth, but sugar candies help a lot. Yet again, the Americans were hampered by a shortage of fighters that forced commanders to choose between supporting strikes or protecting their ships.
In any case, the group rendezvous became a mess – VF-6 failed to find VB-6 and VS-6, instead elected to fly very high cover over what they thought were VT-6s TBDs, with who they had no radio contact. The Hornet Air Group was tardy in launching, and then set out on completely the wrong heading for the Japanese fleet, all except for VT-8. Cdr John C. Waldron’s squadron alone chose to take a course which unerringly took them directly to Kido Butai. Unwittingly, VF-6 was actually escorting Waldron, having mistake his squadron for VT-6. Only the Yorktown Air Group, which launched her strike an hour after the others when no further news of further carrier sightings was evident, managed a well-coordinated running rendezvous.
The Hornet Air Group, less Torpedo Eight, suffered terrible losses without sighting even a single Japanese ship. Under the leadership of Cdr Stanhope C. Ring, 37 SBDs and 10 F4Fs droned west for hours, passing far to the north of Kido Butai. Gradually the shorter-ranged F4Fs began to run low and fuel and in pairs, then in divisions, they turned back, leaving the SBDs alone. None of the fighters would manage to find the Hornet, with all of the forced to ditch far out at sea. Two of the pilots were never seen again, the remaining eight picked up gradually over the ensuing days by patrol planes, many suffering from exposure or sunburn. The SBDs of VB-8, loaded with heavy 1,000lb bombs, turned back soon afterwards. Cognisant of their poor fuel situation they elected to fly to Midway rather than back to their carrier, jettisoning their bombs just outside the reef – a gesture that was treated as hostile by the jumpy Marine gunners, resulting in damage to several SBDs before they safely landed. Only VS-8, accompanied by Ring, managed to successfully find their way back to base, none the worse for their futile efforts.
Torpedo Eight Attacks
VT-8 was the first to find the enemy. LtCdr Waldron had disobeyed orders to fly due west towards what Hornet’s staff had assumed was the location of the Japanese carriers, and instead had turned to a more southerly course. He found the enemy at 0918, the first of the American carrier squadrons to sight Kido Butai. Waldron tried to get of a radio message informing Spruance of the location of the enemy carriers, but none was ever received. Nevertheless Waldron commenced an attack run that would lead his men into the pages of history.
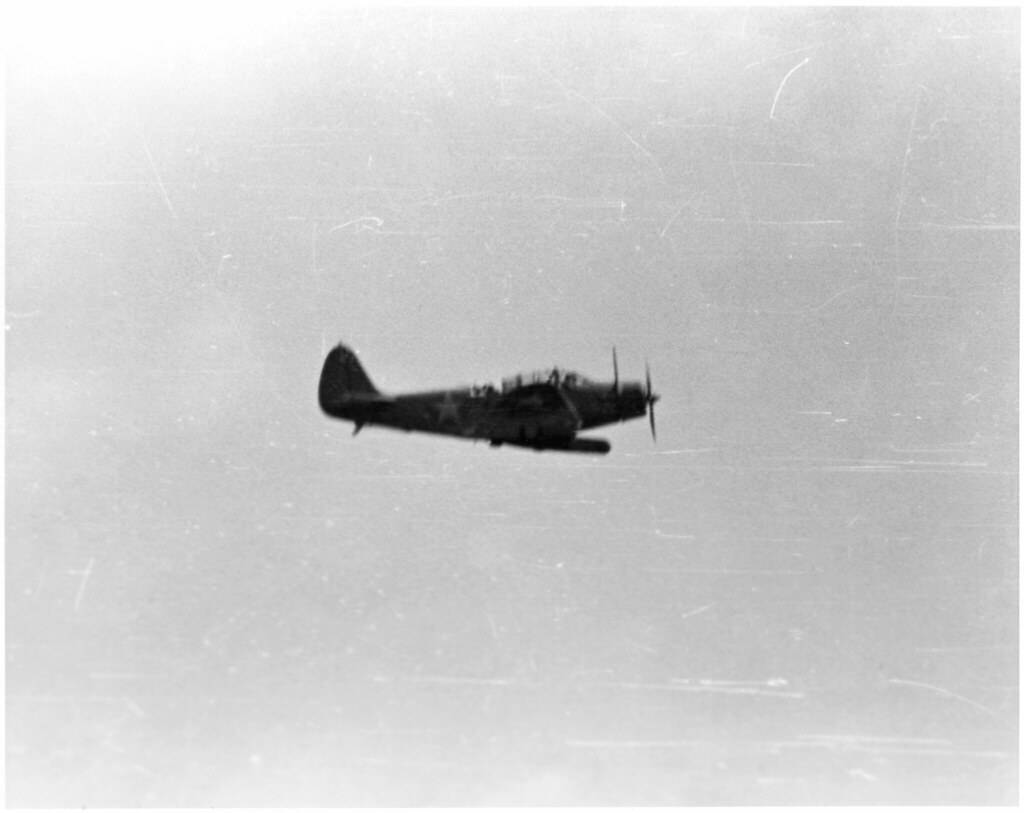
Seeing three carriers before him, Waldron initially took his men toward Akagi but withering anti-aircraft fire and the arrival of an estimated 35 Zeros led him to choose another flattop, most likely the Soryu. It mattered little – one by one, the gallant crews of VT-8 perished as their slow, obsolete TBDs were shot down into the sea by clouds of enemy fighters. Waldron himself was last seen with his aircraft on fire, both wingmen already lost. He stepped out of the cockpit but did not have time to release his parachute before his TBD crashed. Only Lt George Gay’s aircraft survived long enough to release its torpedo, but he too was shot down without seeing the results of his drop. Gay survived the crash and escaped from his sinking aircraft, but his rear gunner perished. That left Gay as the sole survivor of his squadron – 15 TBDs had been shot down, carrying 29 men to their deaths. High above, Lt James Gray’s VF-6 watched the TBDs go in but never heard any calls for help. After orbiting uselessly for 30 minutes the fighters turned for home without firing a shot.
Torpedo Six
Then came Enterprise’s VT-6 – fourteen TBDs under LtCdr Eugene E. Lindsey. Lindsey had been painfully injured in a crash a few days before the battle that had left him with broken ribs and a strained back, but he refused to let his men fly into battle without him. Despite taking off from the Enterprise slightly earlier than Hornet’s VT-8, Lindsey’s men took a more circuitous route to find the enemy and ended up lopping around to attack from a different direction, about half an hour after Waldron had begun his attack.
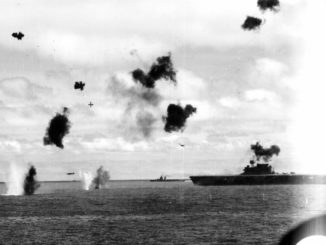
Arriving from the southwest, Lindsey split his bombers into two groups of seven, leading the first division himself whilst the second division was led by Lt Arthur V. Ely. Lindsey hoped to be able to deliver an ‘anvil’ attack against one of the Japanese carriers and singled out the Kaga as the object of the attack. The Japanese carriers spotted the newcomers whilst they were still some distance off, and turned away from the incoming Americans. This meant that the 110-knot TBDs were trying to overhaul the 30-knot carriers – it took an agonisingly long time before attack position was reached. All the while VT-6 was exposed to anti-aircraft fire from Kido Butai and the unwanted attentions of the same Zeroes that had annihilated VT-8.
Ten of the Devastators were shot down before they reached position to release their Mark 13s, including the aircraft of LtCdr Lindsey – none of the crew survived. Ely frantically radioed for help from VF-6, who he assumed were still at high altitude, but Gray’s fighters never heard the call. Eventually the survivors reached attack position and five torpedoes were dropped against the Kaga, but again none of the American fish hit home. One TBD appeared to explode when its torpedo was hit by fire from a Zero, whilst the crew of another was forced to make a water landing because of fuel leak caused by battle damage, the two crewmen spending 17 days adrift before they were sighted by a PBY and picked up. Only four TBDs returned to Enterprise, one of them so badly damaged it had to be pushed over the side.
Torpedo Three
The next squadron to arrive, and the last of the three torpedo units, was Yorktown’s VT-3. Unlike the other groups, Yorktown’s flyers had managed to rendezvous successfully and LtCdr Lance E. Massey’s TBDs had an escort of six F4Fs from VF-3, and high above 17 Dauntless bombers of VB-3 waited to make an attack coordinated with the torpedo planes. The fighter escort did little good, as LtCdr John S. Thach’s men had to fight for their lives and could not offer any protection to the vulnerable TBDs – one Wildcat was shot down and another forced to break off with damage, the survivors using Thach’s innovative ‘beam defense’ manoeuvre to defend each other. Unfortunately this left Massey’s men exposed to the attentions of the relentless Zeros.
The twelve Devastators bored in towards the Hiryu, with five TBDs under Chief Wilhelm G. Esders reaching attack position unhindered. All of the Mark 13s they released failed to hit the carrier, passing ahead and astern of her. Three of Esders’ Devastators were shot down soon afterwards. The other TBDs, including that of Massey, never got the chance to attack as the Zeros picked them off one by one, leaving no other survivors. Massey himself was one of the first to fall, his aircraft falling victim to a Japanese fighter. In total ten of VT-3’s Devastators were lost, to add to the 25 from VT-6 and VT-8 that failed to return. Not a single torpedo found it mark.
The loss of 35 TBDs during the attacks was final proof of the complete obsolescence of the aircraft, Facing the cream of the Japanese naval air arm, the venerable old Devastator – slow, unwieldy, and carrying a torpedo that was unreliable at best – had been shown to be totally inadequate in modern war, and many fine crews had paid for this fact with their lives. They had all fallen without managing to inflict any damage on the enemy, but they had served to distract anti-aircraft crews and the Zero pilots, drawing their attention away from other American units which would soon deliver a telling blow. Whilst the TBDs of VT-3 were fighting and dying, high above three squadrons of SBD Dauntless dive bombers had moved into position, completely undetected, and would soon turn the battle decisively in favour of the Americans.

should have sent the dive bombers in first!!