As the Marines consolidated their gains on Guadalcanal and set out to capture the all-important Lunga point airfield, the Japanese immediately responded to their incursion. The unit responsible for the naval defense of the “south seas” area was the 8th Fleet, based at Rabaul under the command of VAdm Gunichi Mikawa. 8th Fleet had no carriers or battleships, but it did have a force of heavy cruisers including Mikawa’s flagship, Chokai, with a powerful gun and torpedo armament. Understanding that the landing force was at its most vulnerable in the initial hours, Mikawa moved quickly to gather his ships, some of which were engaged in routine duties escorting merchant ships to outlying bases, so that he could counter-attack. In total he had available for the operation 7 cruisers – Chokai, Kako, Furutaka, Aoba, Kinugasa, Yubari and Tenryu – and a single destroyer, Yunagi.
Allied intelligence had already located several Japanese cruisers in the Rabaul area, and as Mikawa set sail early on August 7 it was not long before he was spotted. B-17s from Gen. Douglas MacArthur’s Southwest Pacific theatre were carrying out a bombing raid on Rabaul in support of the Guadalcanal landings when they reported several warships heading east. In the evening the submarine S-38 was almost run down by Mikawa’s force 20 miles south of Cape St. George, but avoided damage and radioed a contact report.
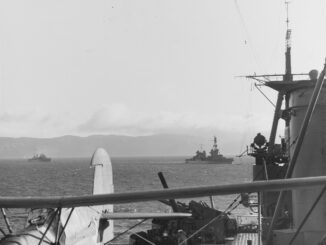
To defend against the possibility of a surface attack, RAdm Richmond K. Turner had been provided with a large force of his own. This included eight cruisers, three of them belonging to the Royal Australian Navy, and fourteen destroyers. These were commanded by RAdm Victor A.C. Crutchley, a British officer on loan to the RAN. Crutchley’s force was reduced when the admiral was called to a conference by Turner, and Crutchley elected to take the cruiser Australia rather than a smaller vessel.
Air Searches
The air search plan for Operation Watchtower was the responsibility of RAdm John S. McCain, commander of Task Force 63 of Operation Watchtower, the air component. McCain’s command included both Navy and AAF units with long-range aircraft, primarily PBY Catalinas from Patrol Wing 2 and B-17 Flying Fortresses from the 11th Bomb Group. Both types of aircraft had an effective search range of about 700 miles, although the PBYs could be deployed further forward into the lower Solomons by shifting their supporting tenders to appropriate anchorages. In this way the tender McFarland, base for 5 PBYs, was sent to Ndeni in the Santa Cruz group, and the Mackinac was likewise sent to Maramasike Passage on the island of Malaita with 9 PBYs from VP-23. The PBYs would be responsible for searching north of the Solomons to detect any large Japanese force coming south from Truk, whilst the 11th BG’s more heavily armed B-17s would patrol “the Slot” through which Japanese reinforcements would most likely pass.
Because the B-17s could only operate from Espiritu Santo, their ability to search for up the slot was limited by their range – they could only fly as far as the southern end of Santa Isabel island before they had to turn back. The crews lacked the skills to fly search missions at night, which meant that their flights had to be scheduled so as to complete the return leg in daylight. This meant that the parts of the Slot that they could reach were only covered in the late afternoon, leaving plenty of time for a fast Japanese force heading for Guadalcanal to transit the area before nightfall and still remain undetected. As it turns out, this is exactly the type of approach that Mikawa used and subsequent analysis showed that one B-17 had turned back 60 miles short of spotting him. Aware of this possibility, Adm Richmond Turner had ordered additional searches of this area for August 8, possibly by radar-equipped PBYs from Malaita that could use their ASE radars to probe at night, but these never occurred and it is unclear whether these orders ever reached McCain – perhaps a victim of the terrible radio snarls that affected the entire operation.
With SoPac’s B-17s unable to effectively cover the northern Solomons, responsibility instead fell to MacArthur’s forces to provide that coverage. This duty was given to the Royal Australian Air Force’s 6 and 32 Squadrons, both equipped with Lockheed Hudsons. Flying from Gurney airfield, codenamed “Fall River”, in Milne Bay on the extreme southeast tip of New Guinea, these aircraft could easily cover the northern part of the Solomon Sea including the upper part of the Slot and the area between Bougainville, New Georgia and Choiseul. On August 8 the Australians provided the first warning of Mikawa’s approach – at 1020 a Hudson pilot radioed a sighting of a force including “seaplane tenders or gunboats” south of Bougainville. Japanese seaplanes were seen in the vicinity, perhaps explaining how Mikawa’s cruisers could be misidentified. Uncertain if this message had been received, the pilot hurried back to Milne Bay and made an in-person report. A second RAAF Hudson also spotted Mikawa but had similar radio issues and made a verbal report upon landing at Milne Bay.
Due to badly overloaded radio networks, these reports did not make it to Turner’s staff until about 1830. The hurried planning process for the operation had failed to put in place a robust communications scheme. This was made worse by the need for two completely separate commands, Ghormley’s South Pacific and MacArthur’s Southwest Pacific, to share information – particularly sighting reports – quickly and accurately. The Hudson’s report had to pass from Fall River, to SWPA headquarters in Brisbane, to CinCPOA (Nimitz) in Hawaii, to SoPac HQ (Ghormley) at Noumea, and finally Turner aboard his command ship McCawley, which at various points during the day was unable to transmit or receive messages as it was buttoned up to repel air attacks and was in any event struggling with a lack of radio sets and operators.
When he eventually received them, Turner came to the wrong conclusion. He assumed that the Australian report of “seaplane tenders” was accurate, and that these ships most likely would head to the secluded Rekata Bay on the northwestern coast of Santa Isabel and set up a seaplane base for attacks on Lunga during August 9. Two pieces of information seemed to back up this assumption. Firstly, seaplane tenders with aircraft on the water had been reported at Rekata Bay on July 9 and July 14, suggesting this was a regular basing location for seaplanes. Secondly, a Wasp SBD had reported shooting down a floatplane in the vicinity of Santa Isabel at 0815 on August 8. Actually, this was an E13A launched from Kako of Mikawa’s force.
The Wasp aircraft was part of a morning search launched from Fletcher’s carriers to cover the Slot. The contact with Kako’s floatplane was the only result of this search, with no sign of the Japanese cruisers reported. An afternoon search was launched from Enterprise, consisting of 9 SBDs and 14 TBFs, but these too reported no contacts. It later transpired that one TBF had been within 30 miles of Mikawa’s force at 1530 but had not seen it before returning. The Allied cruiser force, despite possessing several Walrus and SOC seaplanes, reserved them for gunnery spotting and anti-submarine duties as per Crutchley’s plan for protecting the landing areas and did not launch any search missions.
Mikawa’s own air searches, by contrast, provided accurate reports on the locations and numbers of Allied ships. His cruisers launched three E13As at 0630, one of which was shot down by the Wasp SBD. One of the others made it to the roadstead off Lunga and reported a battleship, 6 cruisers, 19 destroyers and 18 transports, an accurate enough count that demonstrated how badly outnumbered the 8 Japanese ships were. Mikawa opted to press on, despite his having intercepted the Australian contact reports and therefore believing that his approach would be opposed.
Crutchley’s Radar Ships
As Mikawa pressed on, unobserved since being sighted by the Australian Hudsons, Turner continued to believe that the enemy was heading for Rekata Bay. He was more worried about the impending departure of Fletcher’s carriers, and called a meeting of senior officers aboard his flagship to discuss what to do next. RAdm Crutchley opted to take his flagship Australia out of the northern group to the meeting, leaving Capt Bode on the Chicago in command.
The force defending the Lunga and Tulagi landings was amply equipped with radar. All of Crutchley’s cruisers and many of his destroyers were fitted with the best available warning sets, but the technology was still in its early days and many officers were struggling to understand and best use the equipment. In March 1942 the US Navy had published “Radar Bulletin No. 1” (RADONE) to provide guidance to the fleet whilst acknowledging that much would have to be figured out in the field. RADONE cautioned skippers to operate their radar sparingly for fear of it being picked up by enemy radar detectors, with a sweep every ten minutes unless in definite contact with the enemy.
The Allied ships defending the Guadalcanal landings were adequately provisioned with radar sets, but inexperience and the circumstances of the situation greatly limited its effectiveness. Chicago, as “Black Base”, had been performing fighter direction duties during the previous two days with her CXAM. Her radar operators had been busy attempting to repel the two raids of the August 7 and 8, as well as directing bombing attacks. Her report of the action stated that her CXAM found no contacts before or during the action “due to proximity of land”. Some sources report that her radar was not in continuous operation, possibly because Capt. Bode was following the policy outlined in RADONE. Canberra, an Australian ship, was fitted with a British Type 271 radar that had only recently been installed. However, the 271 was an excellent set and had proved itself in combat, with the Suffolk (a sister of Canberra) effectively using her set to shadow the Bismarck in May 1941. Canberra noted in her report that “Type 271 RDF was in operation but interference from surrounding land minimised its efficiency”. Crutchley’s force was reduced in effectiveness when the destroyer Jarvis, fitted with an SC set, was hit by a torpedo on August 8 and the Mugford, also with an SC, was hit by a bomb. Both were replaced in the screen by destroyers which lacked radar. All of the ships were operating in a state of reduced readiness, none of the commanders expecting a Japanese attack. The Northern Group of US cruisers Vincennes, Astoria and Quincy were all equipped with SC.
Crutchley’s night defence plan called for two picket destroyers to patrol north and south of Savo Island, with the twin tasks of detecting enemy surface raids by radar and performing an anti-submarine role. The destroyers Blue and Ralph Talbot were selected for this job, both being equipped with SC. Their designated patrol courses took into account the anticipated performance of their radar, but their tracks were not coordinated and it was possible for pair to be separated by a distance greater than the likely coverage of their radar, which was about 10,000 yards or slightly less than 5 nautical miles. The nearby volcano of Savo Island also may have affected the performance of the SC, as Blue apparently failed to spot the damaged Jarvis leaving the area whilst hugging the island. Like all the ships of Task Force 62, Blue and Ralph Talbot had been on high alert for two days and their crews were extremely fatigued.
Mikawa Attacks
Having remained undetected since being sighted by the Australian Hudson, the Japanese cruiser force reach a position to begin their final run-in to the Allied anchorage. Mikawa launched three floatplanes at about 2300, headed for Lunga Point and Tulagi to pinpoint targets. One of these aircraft was picked up by Ralph Talbot on radar, which broadcast a warning over her TBS radio – “Warning warning – Plane over Savo Island heading east”. Several other ships detected the floatplanes, either by radar, sound or visually, but no commander linked their presence to the possibility of a surface attack, indeed some of the cruiser captains had elected to turn in for the night.
Lookouts on the Chokai sighted a destroyer, Blue, at 0043 on August 9, at a range of about 10,000 yards. Everyone on the cruiser’s bridge held their breath, but Blue turned away shortly afterwards – she had not detected the enemy either with radar or visually. Ralph Talbot was even further away and saw nothing. Mikawa had successfully threaded the needle and eluded the two pickets, and he could now press on to engage the cruisers that had been reported to him by his reconnaissance planes. Another destroyer was spotted but this was the crippled Jarvis, lacking radios with which to broadcast a warning even if they spotted the enemy. Furutaka launched torpedoes at Jarvis but these apparently missed.
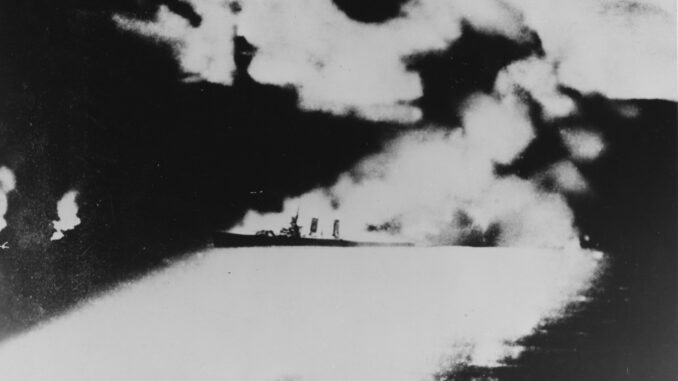
Finally at 0137 Chokai spotted the cruisers of both the Canberra and Vincennes groups. Attacking the Southern Group first, the Japanese fired torpedoes at Canberra and Chicago, then paused as the floatplanes dropped flares to illuminate the targets. Shortly afterwards, they open fire with their main batteries. The results were immediate – Canberra was hit dozens of times by heavy shells and then by a pair of torpedoes, which mortally wounded the Australian ship. Her floatplanes, fuelled and on deck, were destroyed. Losing power and on fire she drifted to a stop, having not even managed to fire her main guns before being crippled. Chicago was also hit by shells and two torpedoes, one of which was a dud but the other caused severe damage to her bow. Unsure where the enemy was, Chicago sailed west and out of trouble but played no further part in the action. The screen destroyer Patterson did manage to broadcast a warning before she too was hammered by Japanese gunfire.
Having crippled the Southern Group, the Japanese then turned for the Northern Group. A steering problem on Furutaka caused the Japanese to separate into two groups which now proceeded to envelope the cruisers under Vincennes’ Capt Frederick L. Riefkohl. More flares dropped by the floatplanes silhouetted these ships, and again a devastating spread of torpedoes was put into the water by Mikawa. Soon thereafter, searchlights reached out from the Japanese warships and targets were found. Astoria opened fire first despite her captain being asleep in his cabin, but Chokai and her consorts poured shells into her and she quickly lost power and drifted to a halt, sinking hours later. Quincy was likewise attacked after the Japanese shifted their fire away from Astoria, and she suffered the same fate. A torpedo fired by Aoba soon crippled Quincy and she sank in less than an hour. Finally Vincennes caught the full fury of Mikawa’s gunfire, followed by three torpedoes, and she sank a few minutes after Quincy.
At this point Mikawa elected to withdraw from the scene of the battle, even though he had not attacked the critical transports that had not yet completed unloading supplies for the Marines. Mikawa later claimed that he was worried about the time it would take to reform his now separated force, attack the transports, and withdraw – time that would expose him to air attacks from Fletcher’s carriers soon after sunrise if he was still within range. Gathering his ships north of Savo, Mikawa then headed back to Rabaul at high speed. The sole Japanese loss was the cruiser Kako, which was torpedoed and sunk by the submarine S-44 on August 10.
Despite the reprieve, Turner realised that he could not remain in the area without cover from Fletcher’s carrier task force or Crutchley’s now devastated cruiser task force. He remained until dawn to allow some additional supplies to be landed, but then gathered his transports, cargo ships and their escorts, including cripples like the Chicago and several destroyers damaged by the last few day’s attacks, and made his way back to Noumea. For now at least, the Marines were on their own.
The morning after the debacle at Savo, as Fletcher’s carriers withdrew to the southeast following Ghormley’s eventual approval, Japanese torpedo bombers were launched to finish off the cripples. Reconnaissance aircraft reported an enemy ‘battleship’, crippled and attempting to escape, southwest of Guadalcanal. 16 torpedo armed G4Ms, escorted by 15 Zeros, found this juicy target 1130. She was actually the destroyer Jarvis, limping south towards Brisbane at 8 knots. Her captain had ordered the ships boats, life rafts and other equipment discarded to reduce topside weight. The G4Ms delivered an attack that scored at least one and possibly two more torpedo hits which caused the destroyer to split in two and sink. Jarvis’ lack of emergency equipment may have contributed to the fact that she was lost with all hands, and with her radios disabled she could not call for help. Her fate remained unknown to the Americans until after the war had ended.
The Marines would have to survive unsupported for the time being, and feelings of resentment towards the navy ran high. But they had the tools of their own defence in hand – they had captured the almost-complete Lunga Point airfield and would race to prepare it for American aircraft.


Leave a Reply